Retaining wall construction: 5 Essential Tips for Success
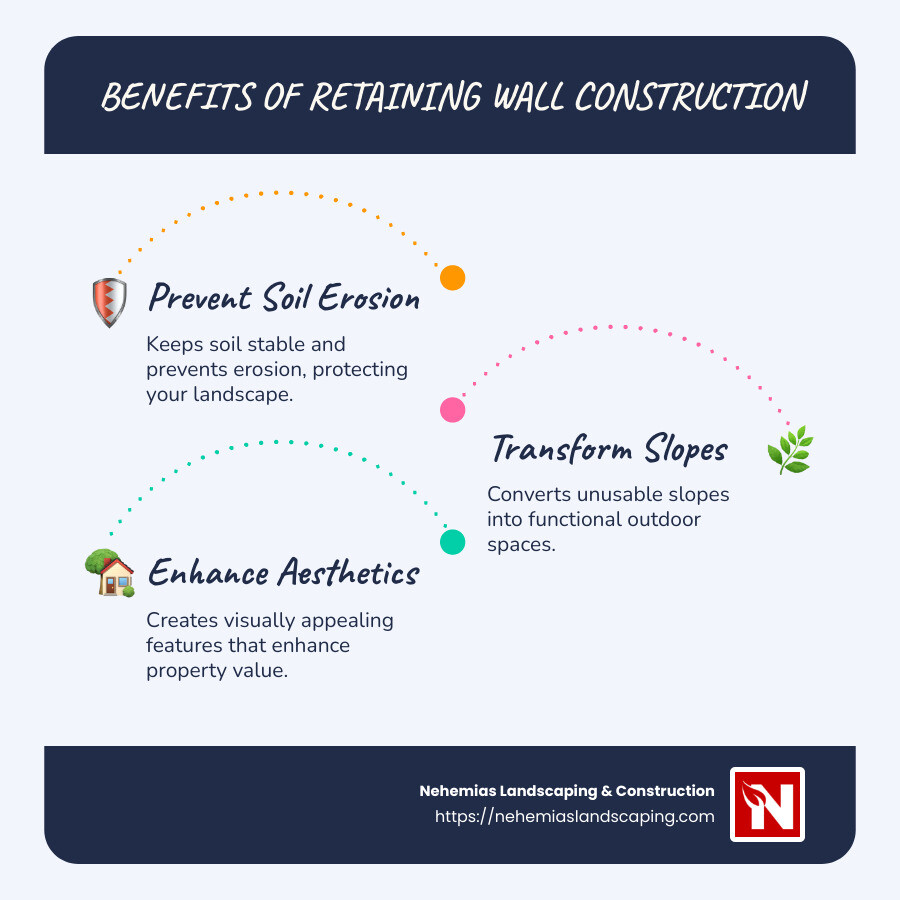
Retaining wall construction is a smart way to improve your landscape while tackling common backyard problems. Retaining wall construction serves three main purposes:
- Prevent soil erosion: Keep your soil where it belongs and stop the natural wear and tear of your land.
- Transform slopes: Turn those challenging hilly areas into functional outdoor spaces.
- Improve aesthetics: Create eye-catching features in your yard with a variety of materials.
Imagine changing a steep, unusable hillside into a beautiful, terraced garden or an extra flat patio space. Retaining walls do just that by simultaneously adding value and functionality to your property. They offer solutions to erosion and drainage issues and provide opportunities for creative landscape design. With the right planning and materials, suburban homeowners can create stunning outdoor spaces that improve their home’s overall appeal.
For those new to this idea, the task can seem daunting. But don’t worry! This article will guide you through the basics and help you turn your vision into reality.
Know your Retaining wall construction terms:
– Retaining wall design ideas
– Hardscape construction
– Landscape design and installation
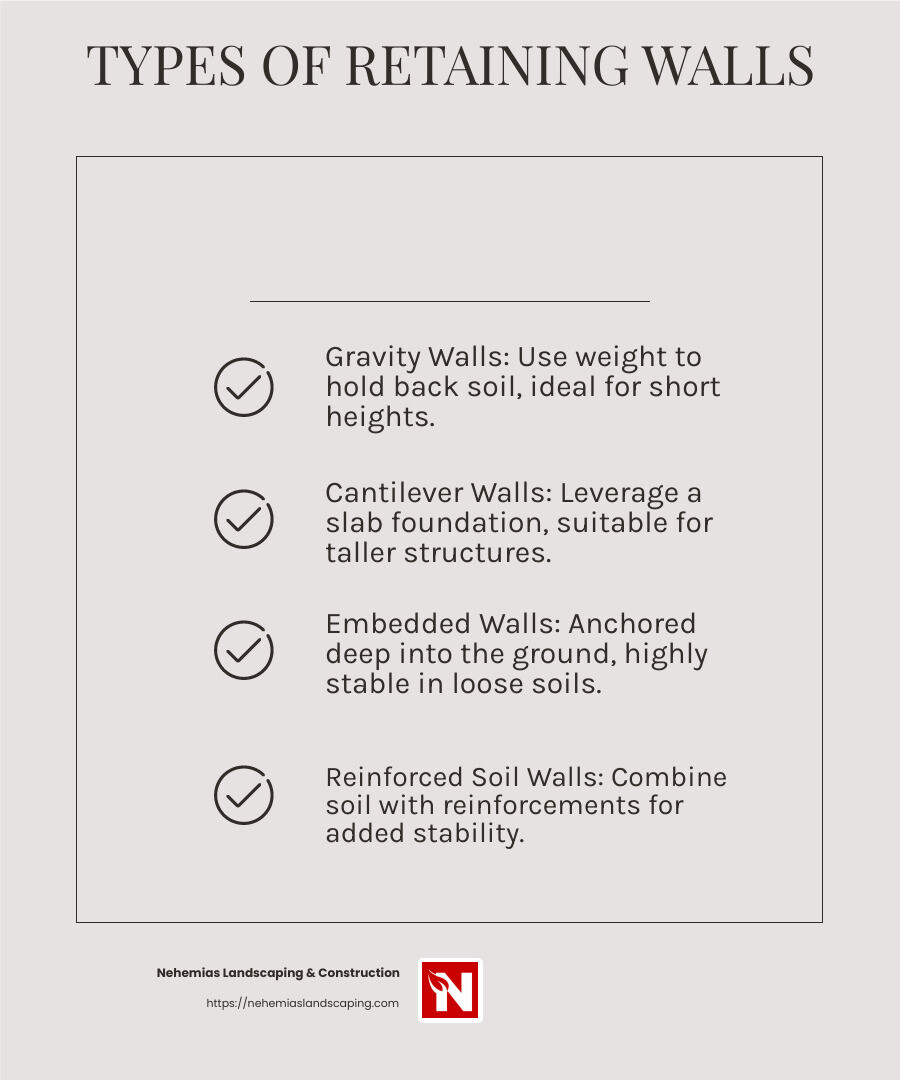
Types of Retaining Walls
When it comes to retaining wall construction, understanding the different types is crucial. Each type serves a unique purpose and is suited to specific conditions. Let’s explore the four main types: gravity walls, cantilever walls, embedded walls, and reinforced soil walls.
Gravity Walls
Gravity walls rely on their own weight to hold back soil. Made from heavy materials like stone, concrete, or bricks, these walls are best for shorter heights. They are simple and cost-effective, making them a popular choice for DIY enthusiasts. However, their effectiveness decreases as the wall height increases due to the significant weight required.
Cantilever Walls
Cantilever walls use a different approach. They leverage a slab foundation that extends into the soil to balance the wall’s weight. This design allows them to support taller structures with less material compared to gravity walls. Often made from reinforced concrete, these walls are ideal for areas where space is limited, and a slim profile is desired.
Embedded Walls
Embedded walls, also known as pile walls, are anchored deep into the ground. This makes them highly stable, even in soft or loose soils. They are often used in commercial projects or areas with significant soil movement. While more complex to build, they offer superior support and are excellent for managing challenging terrains.
Reinforced Soil Walls
Reinforced soil walls combine soil and reinforcement materials like geogrids or mesh. The reinforcements are layered within the soil, enhancing its strength and stability. These walls can be customized with various facings, such as concrete panels or vegetation, to blend seamlessly with the landscape. They are versatile and can be adapted to a wide range of heights and conditions.
Choosing the right type of retaining wall depends on factors like soil type, wall height, and aesthetic preferences. For homeowners in areas like Beverly, Danvers, and other parts of Essex County, Massachusetts, consulting with experts like Nehemias Landscaping & Construction can ensure a successful project custom to your unique landscape needs.
Retaining Wall Construction Essentials
When starting a retaining wall construction project, there are several key elements to consider: foundation depth, drainage systems, interlocking blocks, and construction materials. Each plays a vital role in ensuring the wall’s durability and effectiveness.
Foundation Depth
The foundation is the backbone of any retaining wall. It must be deep and stable enough to support the wall’s weight and the pressure of the soil behind it. Generally, the footing should be about 4 to 6 inches deep and twice as wide as the block you’re using. For walls up to three feet high, the bottom row should be buried halfway into the soil. This provides stability and helps prevent the wall from shifting over time.
Drainage Systems
Proper drainage is crucial to prevent water buildup behind the wall. Water adds pressure and can lead to bulging or collapse. To manage this, use landscape fabric and gravel along the base. For taller walls or those in areas with poor drainage, installing a perforated drain line is advisable. Clay soil retains water, while sandy soil drains too easily. A well-draining soil mix is essential behind your wall.
Interlocking Blocks
For DIY enthusiasts, interlocking blocks are a popular choice. These blocks have a lip or a locking edge, which helps them fit together securely. This design not only simplifies the construction process but also adds strength and stability to the wall. They are suitable for walls up to three feet high and can be found in various styles and colors to match your landscape.
Construction Materials
Choosing the right materials is essential for both the function and appearance of your retaining wall. Options include concrete blocks, natural stone, wood, and bricks. Each material has its pros and cons. Concrete blocks are durable and easy to work with. Natural stone offers a classic look but can be more challenging to install. Wood is affordable but may not last as long as other materials. It’s important to select materials that not only suit your aesthetic preferences but also the specific needs of your project.
By understanding these construction essentials, you can ensure your retaining wall is both functional and attractive. Proper planning and execution will lead to a structure that stands the test of time, enhancing your outdoor space in locations like Beverly, Danvers, and other parts of Essex County, Massachusetts.
Next, we’ll dive into a step-by-step guide on how to build a retaining wall, complete with DIY tips and best practices.
Step-by-Step Guide to Building a Retaining Wall
Building a retaining wall can transform your outdoor space while preventing soil erosion. Here’s a simple guide to help you get started with your DIY project.
DIY Tips
Before you begin, gather all necessary tools and materials. You’ll need items like a metal rake, spade shovel, wheelbarrow, torpedo level, and rubber mallet. Safety gear, such as gloves and eye protection, is also essential.
Recruit a helper. This project involves heavy lifting and precise work, so an extra set of hands is beneficial.
Trench Digging
Start by marking the location of your wall. Use stakes and string or spray paint to outline where your wall will go.
Trench Width and Depth:
– Dig a trench that’s about twice as wide as the depth of your blocks. For example, if your blocks are 10.5 inches deep, aim for a trench about 20 inches wide.
– The trench should be deep enough for a 6-inch gravel base plus half the height of your blocks. For 6-inch blocks, dig approximately 9 inches deep.
Ensure the trench is level. This is crucial for the stability of your wall.
Block Laying
Begin with the first row of blocks. This row is critical for the stability of the entire wall.
- Leveling: Use a torpedo level to ensure each block is level side-to-side and front-to-back. Adjust as needed using sand for minor tweaks.
- Alignment: Make sure the blocks are aligned perfectly. Use a string line as a guide.
- Setting the Blocks: Once a block is level, set it by tapping the center with a rubber mallet. This helps secure it in place.
Backfilling
After laying the first row, it’s time to backfill.
- Gravel for Drainage: Add 3/4-inch rough gravel behind the blocks. This helps with drainage and prevents water pressure from building up.
- Layering: As you add more rows of blocks, continue to backfill with gravel and lightly pack it. Avoid packing too hard, which might shift the blocks.
- Dirt in Front: Place some soil in front of the first row to keep it in place.
Repeat these steps for each row, ensuring blocks are snugly fit and aligned. Sweep away any dirt or debris between rows to maintain stability.
By following these steps, you can build a strong and attractive retaining wall. Whether you’re working on a small garden wall in Groveland or a larger project in Peabody, this guide will help you achieve professional results.
Next, we’ll explore how to tackle retaining wall construction on slopes, including terraced walls and slope management techniques.
Retaining Wall Construction for Slopes
When dealing with slopes, retaining wall construction requires special techniques to ensure stability and aesthetics. Let’s explore how to manage slopes effectively with terraced walls and step-back construction.
Terraced Walls
Terraced walls are an excellent solution for steep slopes. By breaking down a large slope into smaller, manageable sections, terraced walls create flat areas that can be used for planting or recreation.
Benefits of Terraced Walls:
- Erosion Control: They significantly reduce soil erosion by slowing down water runoff.
- Aesthetic Appeal: Terraced walls add visual interest and can be designed to blend seamlessly with the landscape.
- Usable Space: They transform unusable sloped areas into functional spaces.
To construct terraced walls, start from the bottom of the slope and work your way up. Each terrace should have a slight backward lean into the slope for added stability.
Slope Management
Managing a slope involves understanding the natural flow of water and soil. Proper drainage is crucial to prevent water buildup behind the wall, which can lead to failure.
Key Slope Management Tips:
- Install Drainage Systems: Use perforated pipes behind the wall to channel water away. Backfill with gravel to aid drainage.
- Consider Soil Type: Different soils have varying stability. Sandy soils drain well, while clay may require additional drainage solutions.
- Vegetation: Planting grass or shrubs on terraces can help stabilize the soil and absorb excess water.
By considering these factors, you can create a robust retaining wall that handles slope challenges effectively.
Step-Back Construction
Step-back construction involves building the wall with a series of steps or offsets. This technique provides additional stability by allowing each section to lean back into the slope.
Advantages of Step-Back Construction:
- Improved Stability: The step-back design helps distribute soil pressure evenly.
- Flexibility: It allows for design variations, such as curves or angles, to match the landscape.
- Ease of Construction: By working in small sections, you can ensure each part of the wall is securely anchored.
To implement step-back construction, ensure each step or offset is level and well-compacted. This technique is ideal for DIY enthusiasts, offering a straightforward approach to tackling slopes.
By mastering these techniques, you can build a retaining wall that not only improves your property’s aesthetics but also stands the test of time. In the next section, we’ll answer some frequently asked questions about retaining wall construction to further guide you in your project.
Frequently Asked Questions about Retaining Wall Construction
What is the cheapest retaining wall to build?
When considering cost, pressure-treated pine is typically the most budget-friendly option for building a retaining wall. It’s affordable and readily available, making it a popular choice for DIY enthusiasts. However, it may not last as long as other materials, especially in wet climates.
Poured concrete is another economical option. While it requires more initial labor, it offers durability and versatility in design. Concrete can be molded to fit various shapes and sizes, providing a clean, modern look for your landscape.
For those seeking a natural aesthetic, granite can be a cost-effective option if sourced locally. Although the upfront cost may be higher than wood or concrete, granite boasts exceptional longevity and minimal maintenance needs.
How deep do footings need to be for a retaining wall?
The depth of footings is crucial for the stability of a retaining wall. Generally, the footing should extend below the frost line to prevent shifting during freeze-thaw cycles. For most retaining walls, this means a depth of at least 12 inches, but it can vary based on local climate and soil conditions.
Soil stability also plays a significant role. In areas with loose or sandy soil, deeper footings may be necessary to ensure the wall remains stable. Consulting with a local expert can provide guidance custom to your specific site conditions.
Does a 2-foot retaining wall need drainage?
For a 2-foot retaining wall, drainage is usually not required. The soil pressure at this height is typically manageable without additional drainage systems. However, if the wall is built in a location with poor drainage or heavy rainfall, incorporating a simple drainage solution can help prevent water buildup and prolong the wall’s lifespan.
Soil pressure increases with wall height, so while a 2-foot wall might not need drainage, taller walls often do. Installing perforated pipes or using gravel backfill can effectively manage water flow and reduce pressure on the wall.
Understanding these aspects of retaining wall construction ensures a strong, durable structure that meets your needs. Next, we’ll explore more about Nehemias Landscaping & Construction’s commitment to quality craftsmanship and affordable solutions.
Conclusion
At Nehemias Landscaping & Construction, we pride ourselves on delivering top-notch craftsmanship and affordable solutions for all your outdoor needs. When it comes to retaining wall construction, our team is committed to changing your landscape into a beautiful and functional space.
We understand that building a retaining wall is not just about preventing soil erosion—it’s about enhancing the overall aesthetics of your property. Our skilled professionals have years of experience in crafting walls that are both durable and visually appealing. We use high-quality materials and proven techniques to ensure that each project stands the test of time.
One of the key benefits of working with us is our focus on affordable prices. We believe that exceptional landscaping should be accessible to everyone. That’s why we offer competitive rates without compromising on quality. Whether you’re looking to create a small garden wall or a large-scale retaining structure, we’ll work with you to find the best solution within your budget.
Our team is dedicated to guiding you through every step of the process, from initial design to final installation. We take the time to understand your vision and tailor our services to meet your specific needs. With our attention to detail and commitment to excellence, you can trust us to bring your outdoor dreams to life.
Ready to improve your landscape with a stunning retaining wall? Contact us today to get started on your project. Let Nehemias Landscaping & Construction be your partner in creating an outdoor space that you can enjoy for years to come.