
Garden Patio Layers: 4 Essential Steps for Stunning Results 2025
Transform Your Outdoor Space with Garden Patio Layers
Ever wondered what makes a patio stand the test of time? The secret isn’t just those beautiful stones you see on top—it’s what’s happening beneath your feet. Garden patio layers are the unsung heroes of every stunning outdoor space, providing the foundation that turns your backyard dreams into lasting reality.
If you’re short on time but big on curiosity, here’s the quick breakdown of what makes a patio work:
| Layer | Purpose | Typical Depth | Material |
|---|---|---|---|
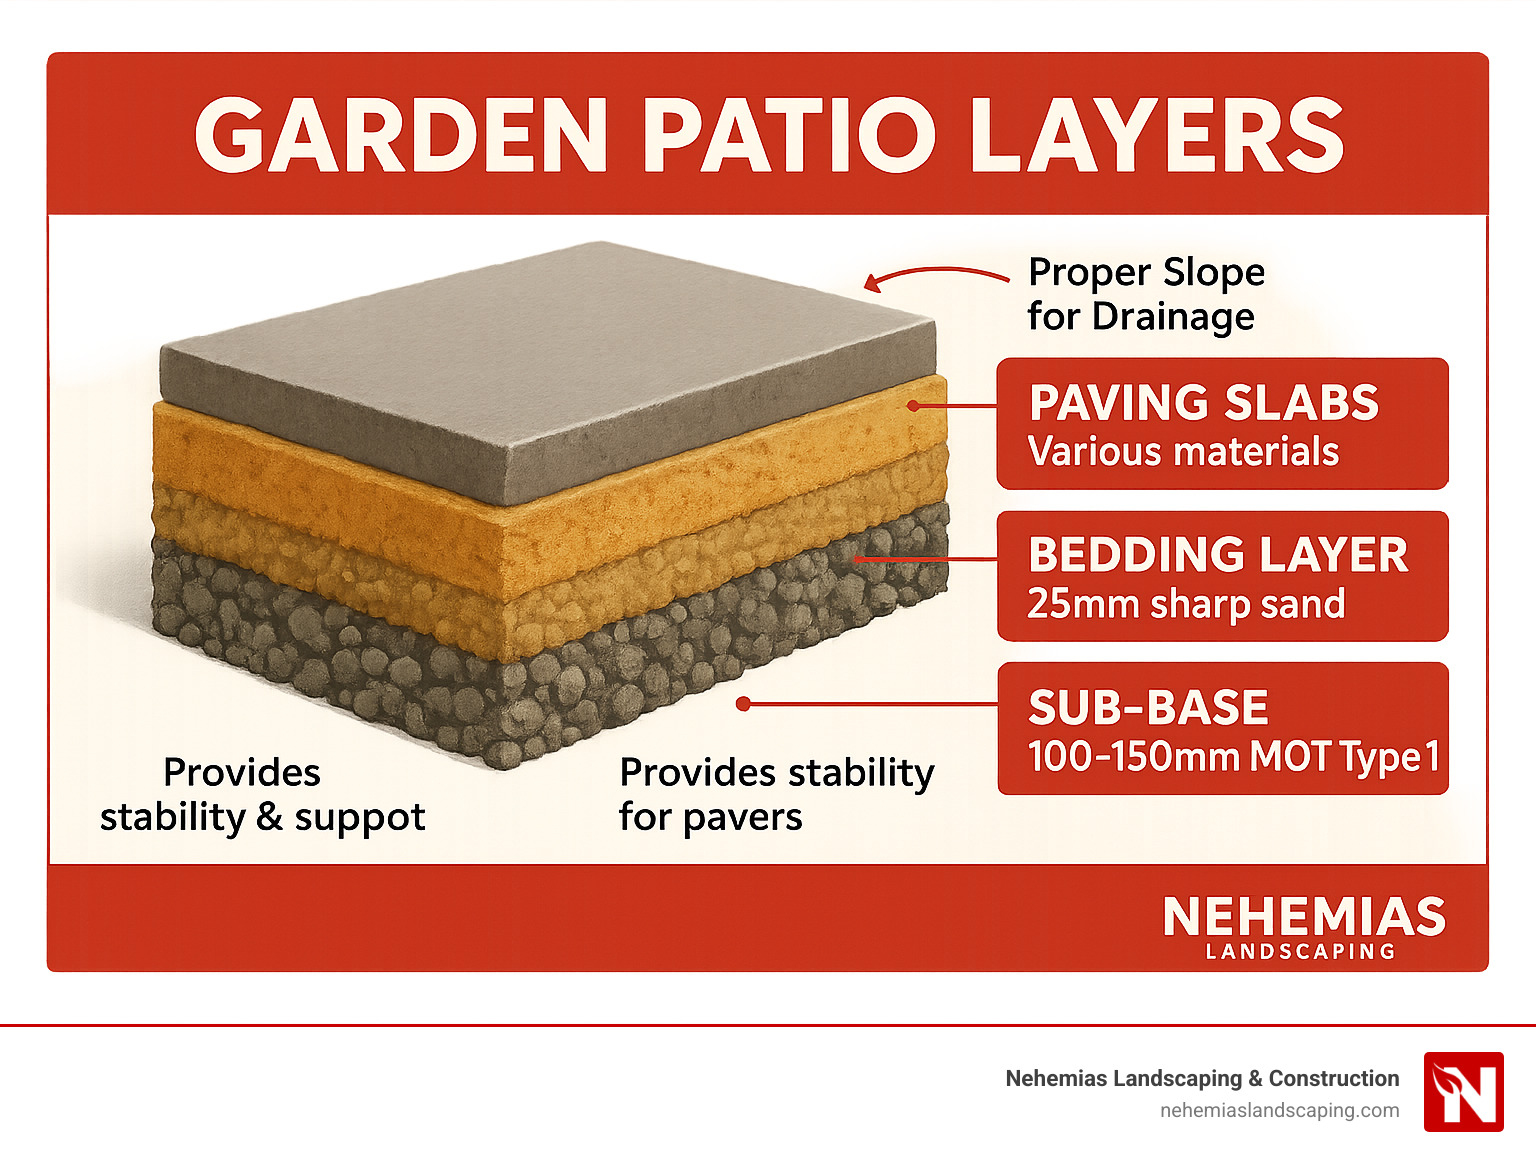
| Sub-base | Stability & load-bearing | 4-6 inches (100-150mm) | MOT Type 1 or crushed stone/gravel |
| Bedding | Level surface for pavers | 1 inch (25mm) | Sharp sand or 5:1 sand-cement mortar |
| Paving | The visible surface | Varies (20-50mm) | Concrete, natural stone, porcelain, etc. |
| Jointing | Locks pavers in place | Fills gaps between pavers | Polymeric sand or mortar |
Taking the DIY route with your patio project isn’t just satisfying—it’s smart for your wallet too. You could save up to 45% compared to hiring professionals. That said, what you save in dollars, you’ll invest in sweat equity and weekend hours. For many homeowners, that’s a trade-off worth making.
“Patios provide living space just outside the house on an easy to maintain, beautiful hard surface.”
Think of your patio like an iceberg—what you see is just a fraction of what’s actually there. Each layer plays a vital role in creating an outdoor space that stays level, drains properly, and doesn’t buckle under pressure (or Massachusetts winters). Understanding these layers helps you make smarter choices whether you’re wielding the tools yourself or discussing options with a contractor.
Material costs typically range from $2.25 to $18 per square foot depending on your paver choices—quite a spread! But remember, investing in proper garden patio layers now means enjoying your outdoor space for decades rather than watching it deteriorate after just a few seasons. A well-built patio adds value to both your property and your everyday life, creating a seamless transition between indoor comfort and outdoor beauty.
Relevant articles related to garden patio layers:
– concrete patio installers
– outdoor tile contractors
– custom patios
The 4 Core Garden Patio Layers Explained
Creating a durable patio isn’t just about laying beautiful stones—it’s about building a proper foundation. Think of garden patio layers as the unsung heroes of your outdoor space. Let’s break down these essential components:
- Sub-base Layer: This is the foundation of your patio, typically 4-6 inches (100-150mm) of compacted crushed stone or MOT Type 1 aggregate. It provides stability, distributes weight, and prevents settling.
- Bedding Layer: Usually 1 inch (25mm) of sharp sand or a 5:1 sand-cement mortar mix that creates a level surface for your pavers and helps with drainage.
- Paving Layer: The visible surface—your choice of concrete pavers, natural stone, porcelain tiles, or other materials, ranging from 20-50mm in thickness.
- Jointing Layer: The material that fills the gaps between pavers, typically polymeric sand, mortar, or exterior grout, which locks everything in place.
Each of these garden patio layers plays a crucial role in the overall stability, drainage, and longevity of your patio. Skimping on any layer is like building a house without a proper foundation—it might look good initially, but problems will emerge over time.
Why Each Layer Matters in Garden Patio Layers
Understanding the function of each layer helps you make informed decisions about materials and installation techniques:
Sub-base: This load-bearing layer is your patio’s muscle. It distributes weight evenly, preventing individual pavers from sinking. A properly compacted sub-base also provides frost protection by allowing water to drain away, prevents weed growth from below, accommodates heavy furniture and foot traffic, and maintains the patio’s level over time.
Bedding: This transition layer serves as a cushion between the rough sub-base and your finished pavers. It creates a perfectly level surface for laying pavers, allows for minor adjustments during installation, helps with drainage to prevent water pooling, and provides a stable setting bed for the paving material.
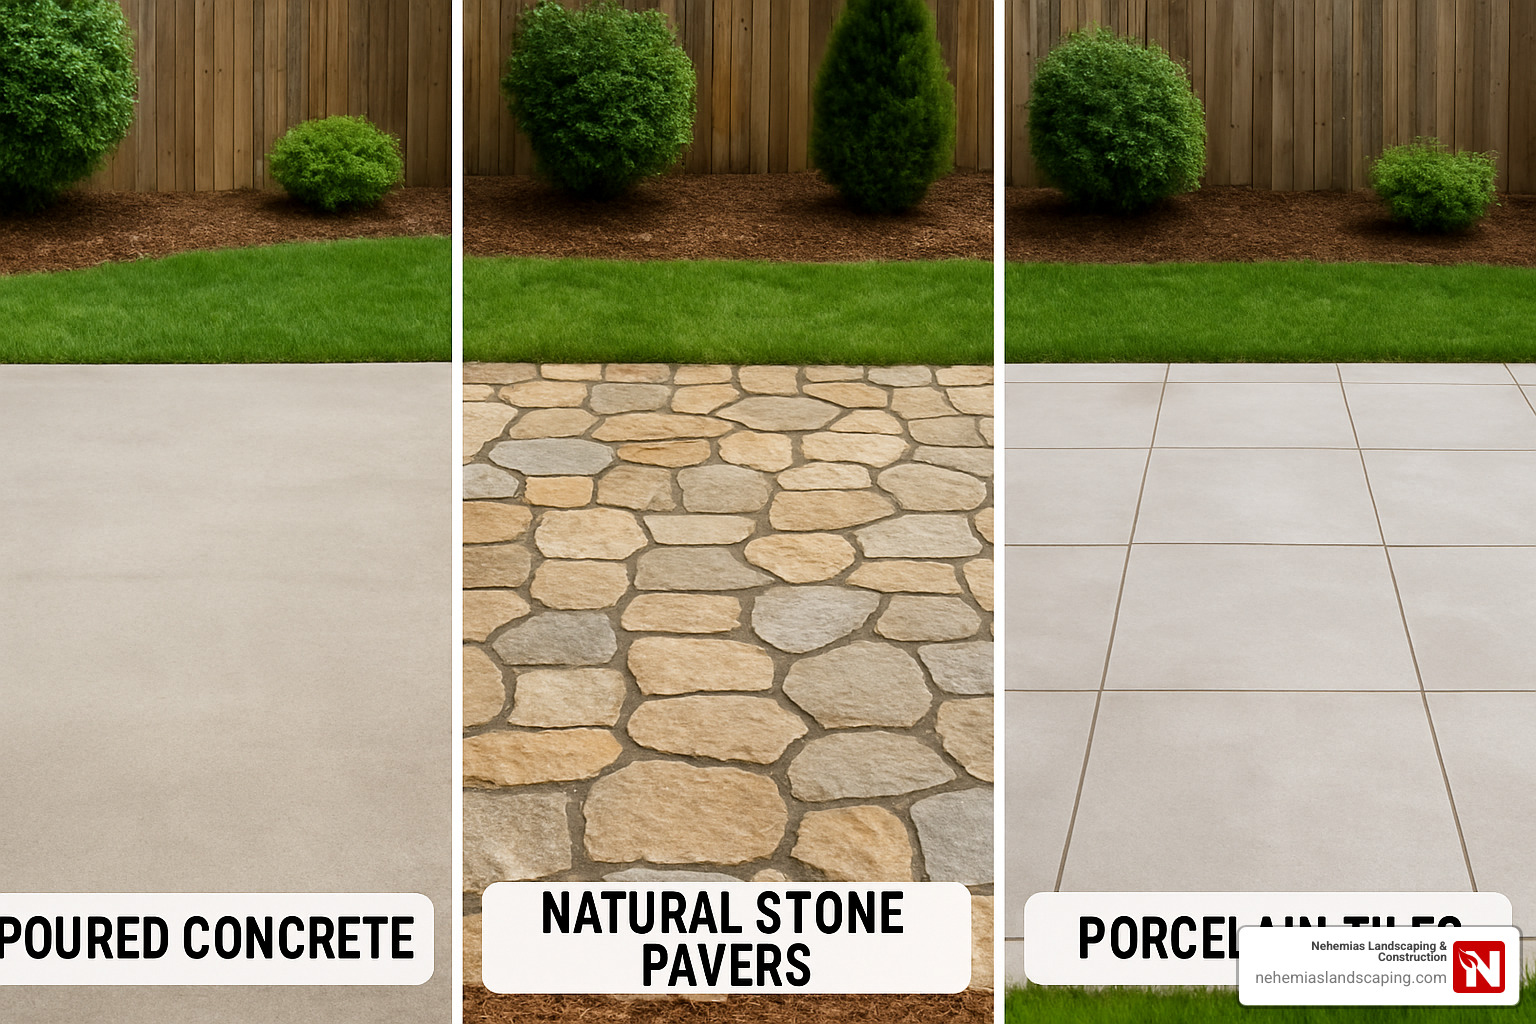
Paving: The star of the show, your paving material not only defines the aesthetic of your outdoor space but also must withstand your local climate conditions, support intended use (dining area, fire pit, etc.), complement your home’s architecture, and provide safe, non-slip surfaces.
Jointing: Often overlooked, the jointing material locks pavers in place to prevent shifting, blocks weed growth between pavers, allows for slight movement during freeze-thaw cycles, and completes the visual appearance of the patio.
“Any method of bedding using voids is not recommended by professional landscapers and can cause significant problems once the job has been completed.”
This warning from experienced patio installers highlights why proper layering techniques matter. Voids in your garden patio layers can collect water, leading to subsidence, staining, freeze-thaw damage, and instability.
When planning your patio project, each layer works together as a system. The sub-base provides essential load-bearing support while facilitating drainage. The bedding layer creates the perfect canvas for your pavers. Your chosen paving material must balance beauty with durability for Massachusetts weather conditions. And finally, proper jointing prevents weeds while maintaining stability through seasonal changes.
A well-built patio with proper garden patio layers will stand up to New England’s freeze-thaw cycles, heavy furniture, and years of enjoyment. At Nehemias Landscaping & Construction, we’ve seen how attention to these foundational details makes the difference between a patio that lasts decades and one that needs repairs after just a few seasons.
Site Survey & Ground Preparation for a Rock-Solid Patio
The secret to a patio that lasts for decades begins long before the first paver is laid. Proper site preparation creates the foundation for all your garden patio layers to work in harmony. Let’s walk through how to set yourself up for success.
1. Mark Your Layout
Start by bringing your patio vision to life with a clear outline. I love using a garden hose for this step – it’s flexible enough to create both straight edges and gentle curves. For rectangular patios, here’s a pro tip: measure diagonally corner-to-corner in both directions. When these measurements match, you’ve got a perfect rectangle!
2. Assess Your Soil
Your soil type actually determines how you’ll approach excavation:
Clay soils tend to hold moisture, so you might need to dig deeper and add extra drainage. Sandy soils drain well naturally but may need more compaction for stability. Chalk subsoils are typically firm and only require standard excavation depths.
Not sure what soil you have? Grab a handful when it’s slightly damp – clay will form a sticky ball, sand will fall apart, and loamy soil will form a loose ball.
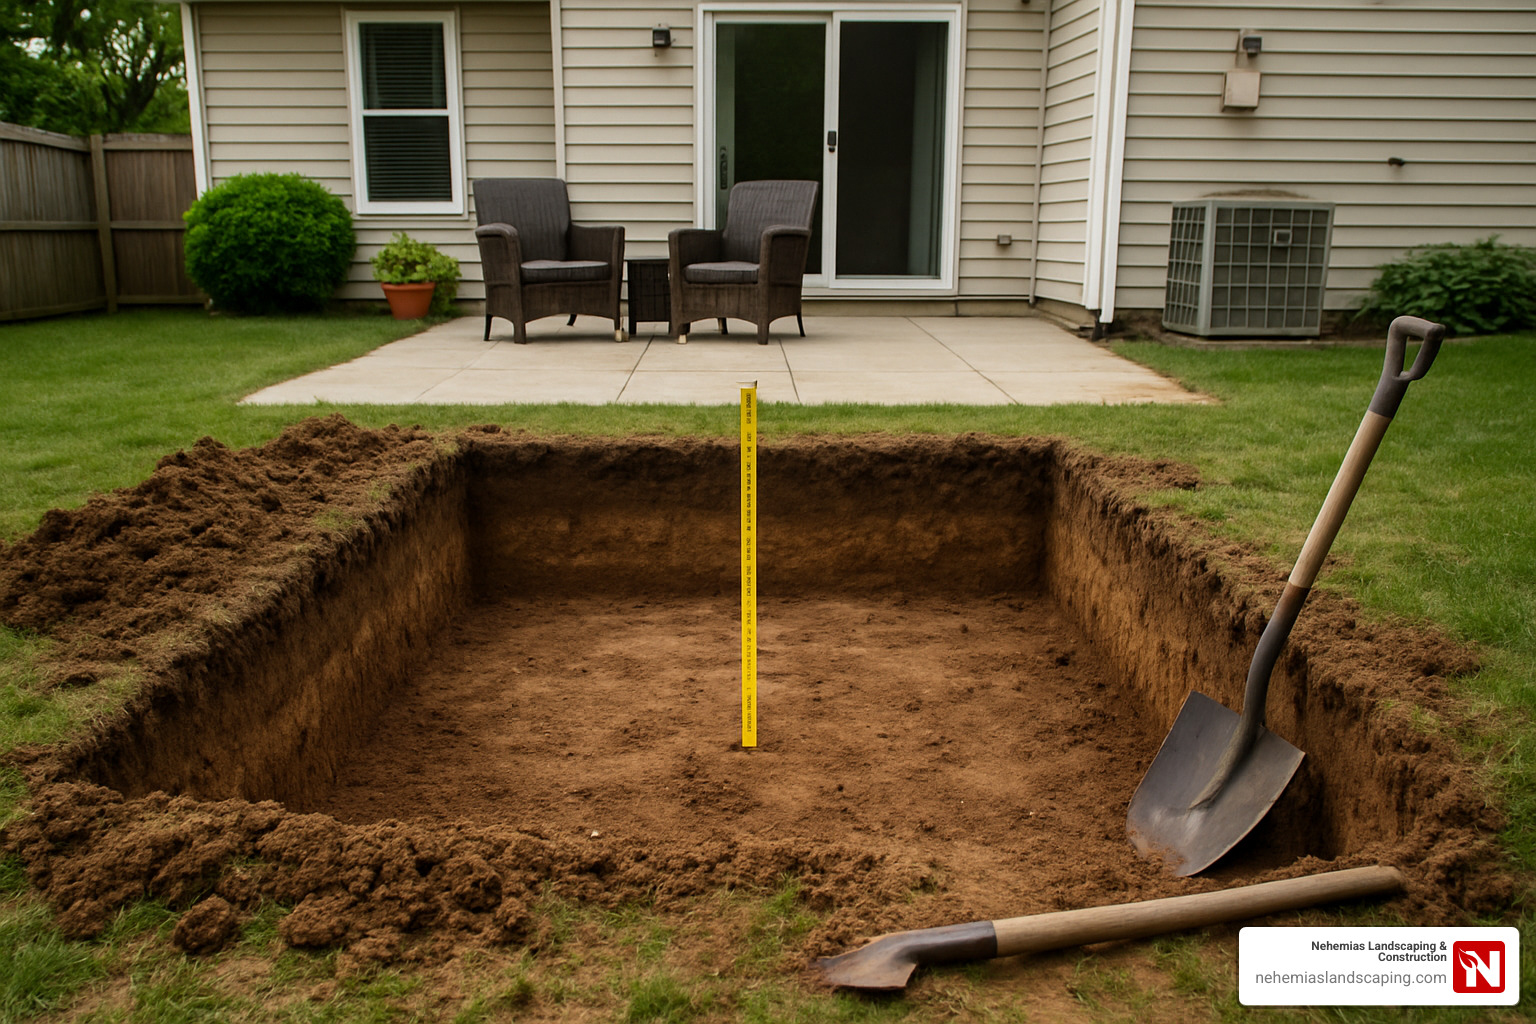
3. Excavate to the Proper Depth
Now comes the real work! You’ll need to dig deep enough to accommodate all your garden patio layers:
Your paving material (typically 1-2 inches), plus your 1-inch bedding layer, plus 4-6 inches for your sub-base. Then add another inch for proper slope. For most patios, this means digging 7-9 inches total.
This is where a sharp garden spade shovel becomes your best friend – its squared edge creates clean, vertical sides that help maintain the structural integrity of your excavation.
4. Establish Proper Drainage Slope
Water pooling on your patio isn’t just annoying – it can damage your home’s foundation and shorten your patio’s lifespan. Create a gentle slope away from your house at a rate of 1 inch for every 4 feet (a 1:48 or roughly 1:40 gradient).
Here’s a simple calculation we use at Nehemias Landscaping: divide the length in millimeters by 80 to get the fall in millimeters. So for a 5.76m (5760mm) patio, you’d need a 72mm drop from house to edge.
5. Check for Utilities
This step could literally save your life. Always call 811 before digging – it’s a free service that marks underground utility lines. I’ve seen too many DIYers hit gas lines or cut through buried electrical cables. One quick call prevents dangerous and expensive mistakes.
6. Install Landscape Fabric
Once your area is excavated, roll out landscape fabric across the entire surface. This inexpensive material is worth its weight in gold – it prevents weeds from growing up through your patio while still allowing water to drain properly. Overlap seams by at least 6 inches and secure with landscape pins.
7. Create a Solid Perimeter
Your patio needs proper containment to prevent the garden patio layers from spreading over time. Either install commercial edge restraints or create a hidden concrete edge by digging slightly wider than your planned patio. These edges act like invisible walls, keeping everything in place for years to come.
Garden Patio Layers: Sub-Base Installation
The sub-base is truly the backbone of your patio. Skimp here, and you’ll regret it when pavers start shifting or sinking in just a few seasons.
MOT Type 1 (sometimes called DTp1) is the industry standard for a reason – this mixture of crushed stone with varying particle sizes compacts incredibly well. The magical thing about MOT Type 1 is how the different-sized particles lock together, creating a solid base that can support tons of weight.
Rather than dumping all 6 inches at once, add it in 2-3 inch layers, compacting each layer thoroughly before adding the next. This approach creates a much more stable foundation than trying to compact it all at once.
For compaction, you’ll want a plate compactor (sometimes called a wacker plate). You can rent one for about $25-50 per day from most equipment rental stores or through Plate Compactor (Rental). Make several passes in different directions until the surface feels solid underfoot.
How do you know when it’s properly compacted? Walk across it – a well-compacted sub-base will show a slight boot print but won’t sink noticeably. If you’re seeing deep footprints, keep compacting!
Don’t forget to maintain your 1:40 slope throughout the sub-base layer – use a long straight edge with a level to check regularly as you work.
Garden Patio Layers: Bedding Options
The bedding layer creates that perfectly smooth surface for your pavers to rest on. Your choice of bedding material depends largely on what type of paving you’re installing.
Sharp Sand Bedding works wonderfully for block paving and standard concrete pavers. Spread it to a depth of 1 inch (25mm) uncompacted, then use screed rails (simple pipes work great) and a straight piece of lumber to level it perfectly. The beauty of sharp sand is how easily it can be adjusted during installation.
Mortar Bedding is my personal recommendation for natural stone, porcelain, and larger format pavers – especially here in Essex County where we deal with freezing winters. Mix a 5:1 ratio of sharp sand to cement until it’s just damp enough to hold together when squeezed. The key is applying a full, even bed with absolutely no voids underneath your pavers. “Spot-dabbing” (putting mortar just in the corners) is a recipe for cracked pavers.
For porcelain tiles, which are increasingly popular but notoriously non-porous, we always apply a special priming slurry to the back of each tile. This significantly improves adhesion to the mortar bed and prevents moisture-related issues that can cause staining.
Some professionals prefer grit sand as an alternative bedding material. With slightly larger particles than sharp sand, it offers superior drainage properties that can be beneficial in areas with heavy rainfall.
At Nehemias Landscaping & Construction, we’ve found that a full mortar bed provides superior stability through New England’s harsh freeze-thaw cycles – especially important for the beautiful natural stone patios we install throughout Essex County.
Material & Tool Calculator: Get Your Quantities Right
Nothing ruins a weekend patio project faster than running out of materials halfway through or being stuck with expensive leftovers. Let’s make sure you get your garden patio layers quantities just right!
Estimating materials isn’t just about saving money—it’s about saving time and frustration too. Most DIYers make the mistake of underestimating what they’ll need, leading to emergency supply runs that waste precious daylight hours.
Area Calculation
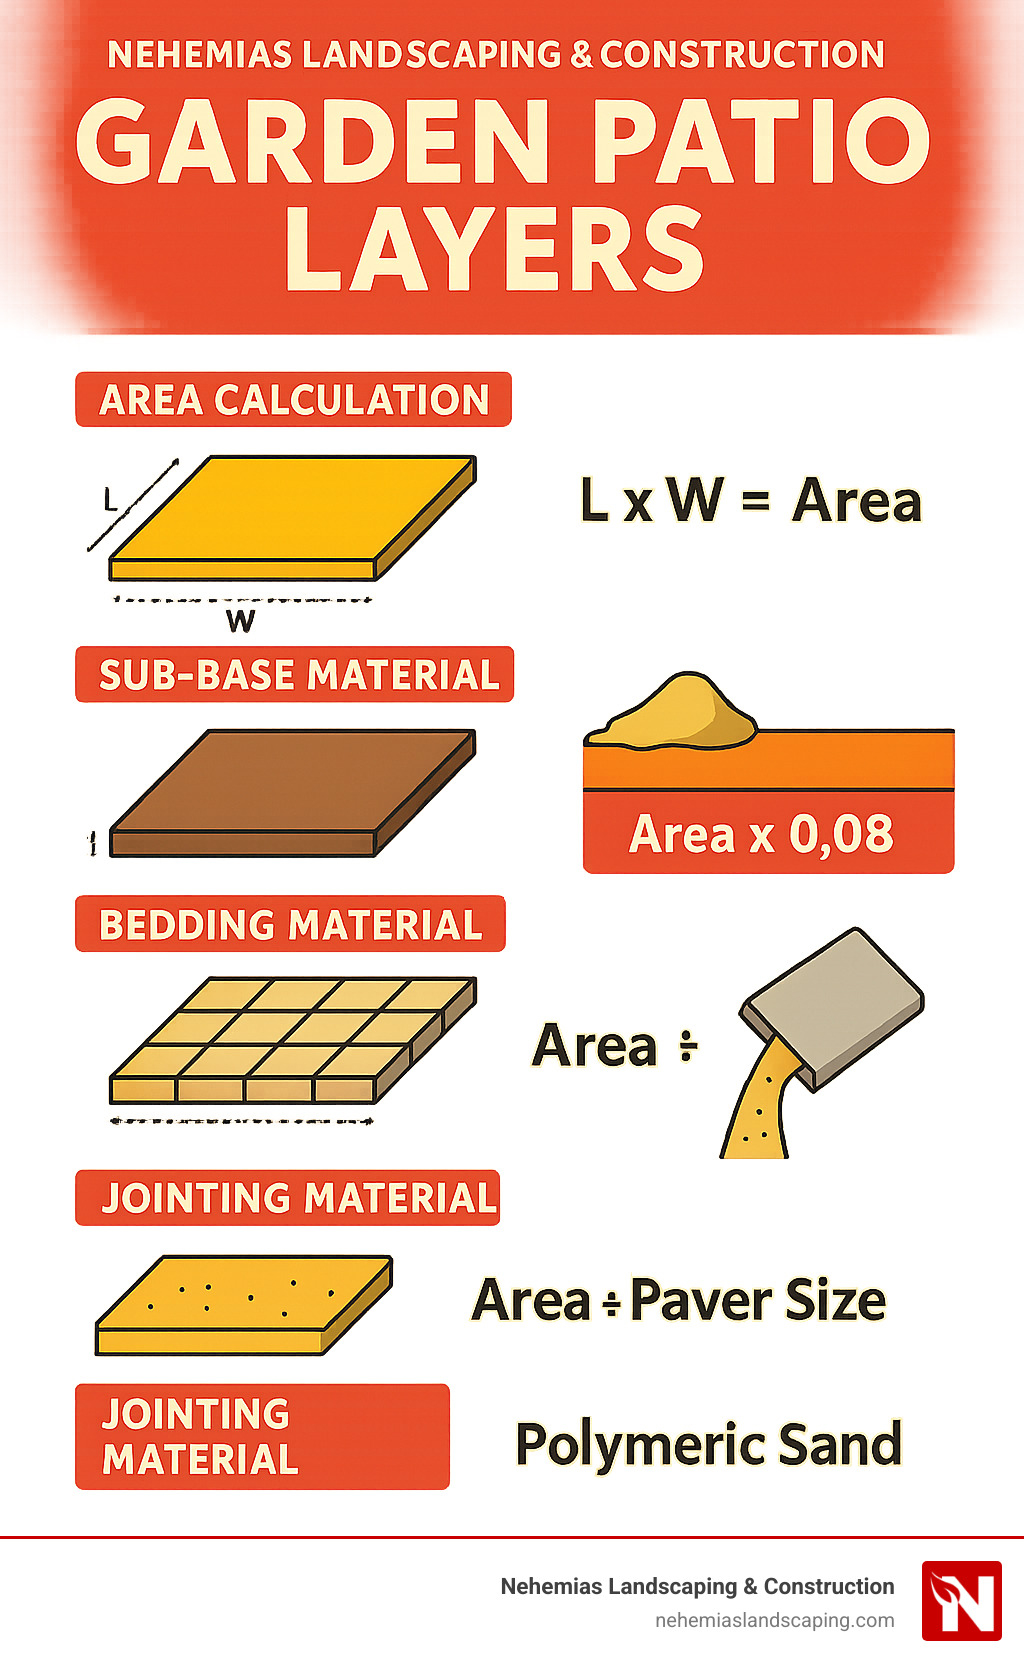
Start with the basics: measuring your space accurately. For rectangular patios, simply multiply length by width. For that curvy, free-form patio you’ve been dreaming about? Break it into imaginary rectangles, calculate each one, then add them together.
Always add that magic 10% extra for cuts, waste, and the occasional dropped paver that cracks. Trust me, this buffer will save your sanity!
Sub-Base Material
The foundation of your patio requires careful calculation:
Area (sq ft) × Depth (ft) = Volume (cubic feet)
For that recommended 6-inch (0.5 ft) deep sub-base, multiply your area by 0.5. Need to order by the cubic yard? Divide your cubic feet by 27.
Real-world example: A 200 sq ft patio with a 6-inch sub-base needs 100 cubic feet of material, which converts to about 3.7 cubic yards. Round up to 4 yards when ordering—better to have a little extra than not enough!
Bedding Material
Your sand bedding layer is thinner but just as important:
For sand: Area (sq ft) × 0.08 = Cubic feet needed
If you’re using mortar instead (which we often recommend here in Massachusetts to handle our freeze-thaw cycles), remember the 5:1 ratio—5 parts sand to 1 part cement. One 80-pound bag of cement mixed with appropriate sand yields about 6 cubic feet of mortar, enough to cover roughly 36 square feet at 1-inch thickness.
Paver Quantity
This calculation seems simple but trips up many DIYers:
Area (sq ft) ÷ Paver size (sq ft) = Number of pavers needed
Don’t forget to add that 10% buffer! For a 100 sq ft patio using 1 sq ft pavers, you’ll need 110 pavers total.
Jointing Material
For polymeric sand, plan on using 50-75 pounds per 100 square feet. The exact amount varies depending on your paver size and joint width—wider joints or smaller pavers require more sand.
Tool Checklist:
No need to buy everything—many specialty tools can be rented for a fraction of the purchase price. At minimum, you’ll need:
For excavation, gather your spade, shovel, wheelbarrow, string line, and stakes. The sub-base work requires a plate compactor (rentable), rake, and level. When working on the bedding layer, you’ll need screed rails (PVC pipes work perfectly) and a 2×4 board for screeding. For the actual paving, have your rubber mallet, block splitter or wet saw, and tape measure ready. Finally, for jointing, you’ll just need a broom and garden hose with mist nozzle.
Online Helpers & Apps
Why do all the math yourself when technology can help? Here are some digital assistants:
Many paver manufacturers offer free calculators on their websites that do the heavy lifting for you. Local aggregate suppliers often provide similar tools specifically for sub-base materials. And don’t forget simple conversion tools for switching between cubic feet, cubic yards, and tons.
The Pythagorean 3-4-5 triangle method is a lifesaver for ensuring square corners: measure 3 feet along one string line, 4 feet along the perpendicular line, and the diagonal between those points should be exactly 5 feet if your corner is square.
Before breaking ground, always call 811 to have underground utilities marked. It’s free, required by law, and could literally save your life. At Nehemias Landscaping & Construction, we’ve seen too many DIY disasters from hitting unmarked pipes or wires—don’t let that be you!
Area Calculator Tool – Coming soon to help with all your patio planning needs!
How to Build the Layers: From Sub-Base to Jointing
Rolling up your sleeves and building a patio yourself is incredibly rewarding. Let me walk you through how to create each of these garden patio layers with the care they deserve.
Step 1: Excavation and Site Prep
Start with a clean slate. Remove all grass, weeds, and topsoil from your marked area. Dig down to your calculated depth—typically 7-9 inches total for a standard patio.
The soil at the bottom should feel firm under your feet. This is your canvas! Lay your landscape fabric with generous 6-inch overlaps at the seams. Think of this fabric as your patio’s first line of defense against weeds trying to crash your outdoor parties years from now.
Step 2: Sub-Base Installation
Your sub-base is like the foundation of a house—invisible but absolutely crucial. Instead of dumping all your MOT Type 1 at once, work in manageable 2-3 inch layers.
After spreading each layer evenly with a rake, fire up that plate compactor and make several passes in different directions. You’ll know you’re doing it right when the loose stones lock together and feel solid underfoot. Your boot should leave a slight impression but not sink in.
Keep checking your slope as you go—that 1:40 gradient (1 inch drop for every 40 inches of length) ensures water will flow away from your home rather than pooling on your beautiful new patio.
Step 3: Bedding Layer Preparation
For a sand bedding, the old PVC pipe trick works wonders. Lay two 1-inch diameter pipes parallel to each other as guides, then pour your sharp sand between them. Using a straight 2×4 board, pull (don’t push) across the pipes to create a perfectly level sand bed. Once screeded, carefully remove the pipes and fill those channels with more sand.
If you’re going with a mortar bed—which I strongly recommend for natural stone and porcelain—mix 5 parts sharp sand with 1 part cement until it’s damp enough to hold together when squeezed. Aim for the consistency of slightly wet brown sugar. Work in sections about 3-4 feet wide so your mortar doesn’t dry out before you can lay your pavers.
Step 4: Paver Installation
This is where your patio starts taking shape! Begin from a fixed edge or corner, using string lines to keep everything straight. For best results, work from multiple pallets to blend any color variations naturally.
When setting pavers on sand, place them firmly and tap gently with a rubber mallet. For mortar beds, especially with porcelain, apply that crucial priming slurry to the back of each paver before pressing it firmly into place. The slurry looks like thin pancake batter and creates an incredible bond between your paver and mortar.
Check your levels frequently—a slight mistake early on compounds as you go. And don’t forget to maintain those consistent joints between pavers (typically 3-5mm) using spacers.
Step 5: Edge Restraint Installation
Your beautiful new patio needs boundaries! Edge restraints prevent the outer pavers from shifting outward over time. You can use plastic edging for a budget-friendly option or pour a concrete edge for maximum durability.
Either way, make sure your restraint extends below the bedding layer and connects with your sub-base for proper support. This hidden hero will keep your patio edges crisp for years to come.
Step 6: Joint Filling
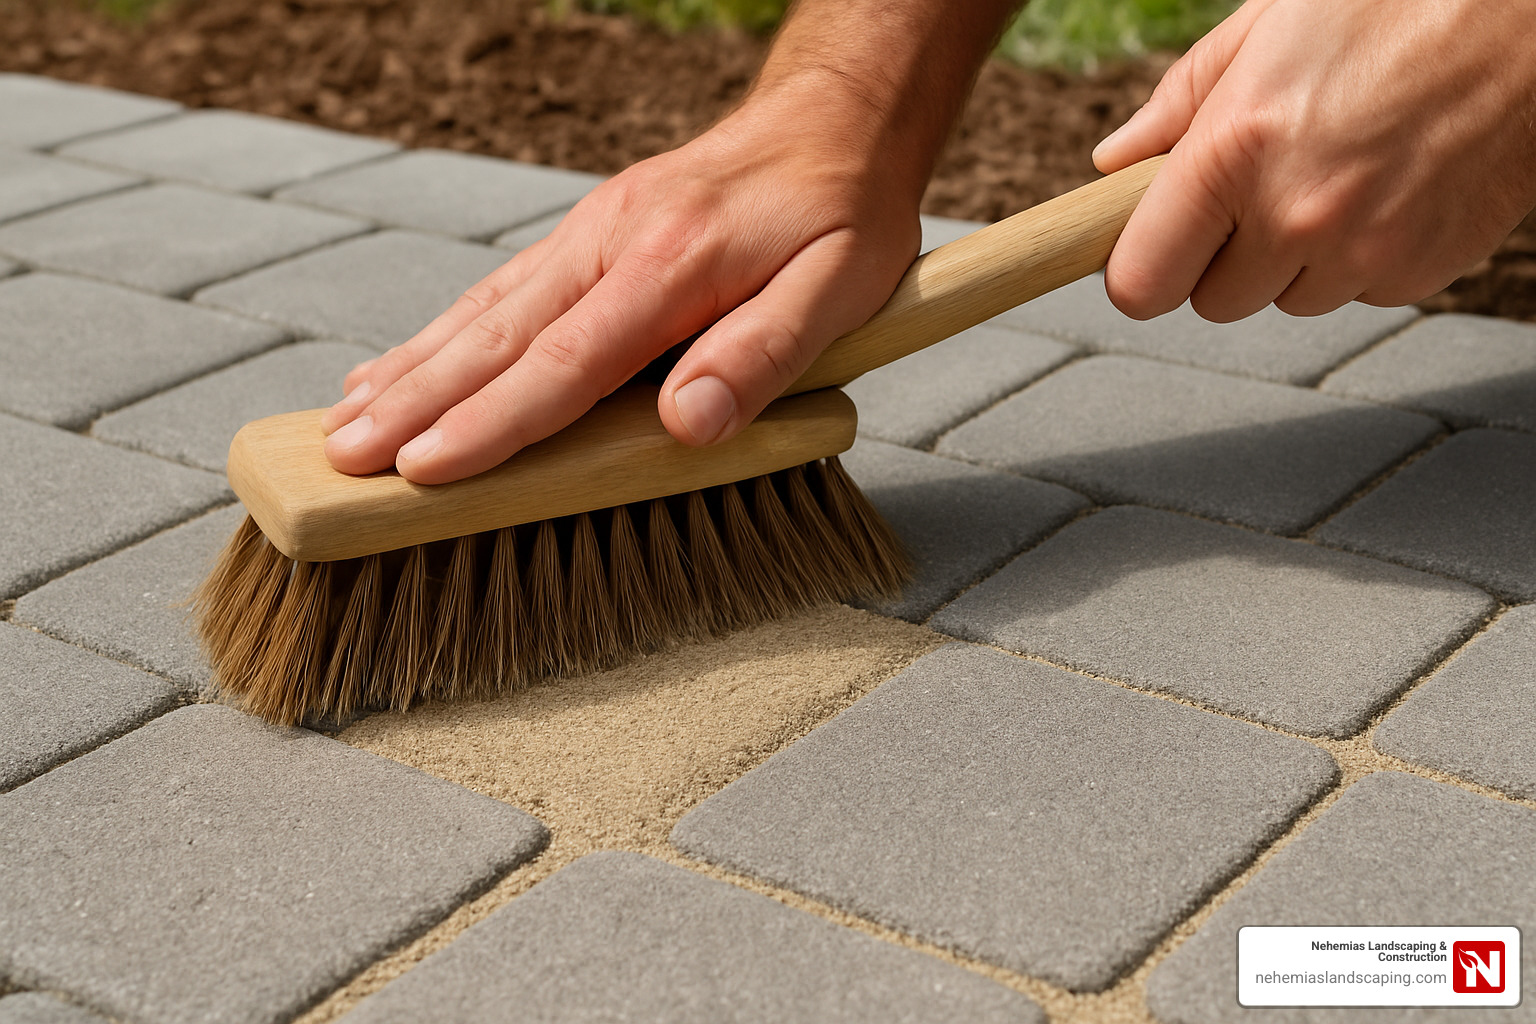
Only fill joints when everything is bone dry. Sweep your polymeric sand across the surface, working it deep into all the joints with a broom. Make several passes from different directions until the joints are completely filled.
After removing all excess sand from the surface (a leaf blower on low setting works great), follow the manufacturer’s instructions for misting. Usually, this means a gentle spray of water that dampens the sand without washing it out. The polymeric binding agents activate with water, creating a firm but slightly flexible fill that resists weeds and ants.
Give it a full 24 hours to cure before walking on your new masterpiece!
Laying Different Paver Types
Each paving material has its own personality and needs:
Concrete Pavers are the friendly, low-maintenance option. Their uniform thickness makes them forgiving for beginners, and many can be installed on a sand bed. The interlocking shapes help them stay put without much fuss.
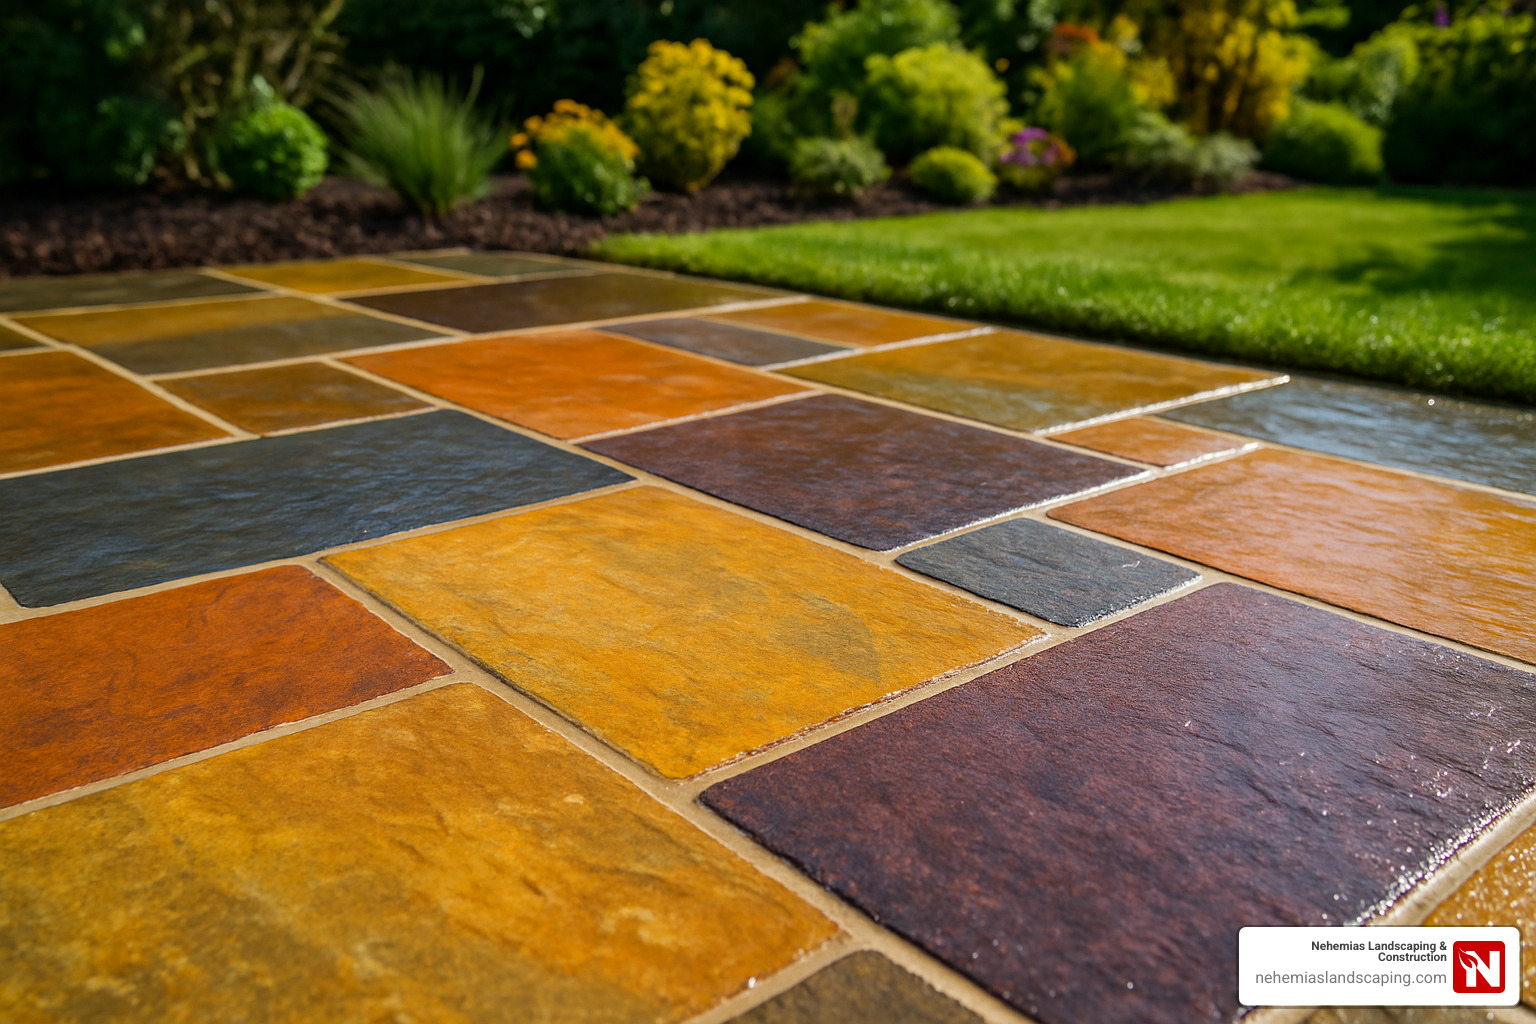
Natural Stone brings best character to your space but demands more attention. The varying thicknesses mean you’ll need to adjust your mortar bed as you go. A full mortar bed is non-negotiable here—spot-dabbing will lead to cracked stones and heartbreak later. Consider sealing after installation to improve those gorgeous natural colors.
Porcelain Pavers are the neat, modern choice. Their extremely low porosity makes them stain-resistant but also means they need special handling. That priming slurry on the back of each tile isn’t optional—it’s essential for proper adhesion. Use exterior-grade grout in the joints for a finished look that will last.
Reclaimed Brick offers vintage charm and eco-friendly appeal. Just be sure to remove all old mortar thoroughly before reusing, and sort them by thickness for easier installation. The extra effort pays off in character that new materials simply can’t match.
In our years of installing patios across Beverly, Salem, and throughout Essex County, we’ve found that while concrete pavers are most DIY-friendly, our clients often fall in love with the timeless beauty of natural stone for their outdoor retreats.
Joint Filling & Finishing Touches
The final layer of your garden patio layers deserves as much attention as the first. Your jointing options include:
Polymeric Sand works beautifully for most applications. After sweeping it into completely dry joints, remove excess from the surface, then mist with water according to manufacturer instructions. The change is almost magical as the polymers activate and lock everything in place.
Exterior Grout is ideal for porcelain installations. Mix according to instructions (usually to a toothpaste consistency), then work it into the joints with a rubber float. Clean excess promptly with a damp sponge before it sets—timing is everything here!
Epoxy Jointing Compound offers premium durability for natural stone. Yes, it costs more, but in high-traffic areas or where weed resistance is paramount, it’s worth every penny. Follow the mixing instructions precisely for best results.
Traditional Mortar Joints create a classic look with natural stone. A 4:1 sand-to-cement mix, carefully pointed with a jointing tool, creates defined lines that complement formal garden designs beautifully.
Complete your patio with proper edging to contain your garden patio layers and prevent shifting. Choose from practical plastic edging, sleek metal borders, decorative stone or brick edges, or hidden concrete restraints depending on your design aesthetic.
For conventional joints, standard builder’s sand will work, but we’ve found that investing in polymeric sand pays dividends in reduced maintenance and fewer weeds over the life of your patio.
Drainage, Patterns & Budget-Friendly Ideas
Creating a beautiful patio isn’t just about stacking garden patio layers correctly—it’s also about ensuring proper water management and designing a layout that’s both functional and appealing. Let’s explore how to make your outdoor space both practical and stunning.
Proper Drainage Solutions
Water is the number one enemy of any hardscaped surface. That gentle 1:40 fall we’ve discussed is essential, but sometimes your yard needs additional help managing rainfall, especially in Essex County where we see plenty of precipitation.
A French drain can be your patio’s best friend. This simple but effective system consists of a gravel-filled trench with a perforated pipe that guides water away from your patio and foundation. It works silently underground, protecting your investment year after year.
For patios adjacent to homes, consider installing drainage channels along the edges. These linear systems collect water runoff before it can cause problems, directing it safely away from both your patio and home.
If you’re particularly eco-conscious, permeable paving might be the perfect solution. These specialized pavers allow water to drain directly through the surface or through wider joints, reducing runoff and helping replenish groundwater naturally.
Many of our clients in Beverly and Salem have acceptd rain gardens as both practical drainage solutions and beautiful landscape features. These planted depressions collect runoff from the patio, filtering it naturally while supporting native plants that thrive in occasional wet conditions.
Paving Patterns for Visual Interest
The pattern you choose for your patio does more than just look pretty—it affects the stability and character of your space. Each layout has its own personality and practical benefits.
Running bond (the classic brick pattern) remains popular for good reason—it’s straightforward to install and creates a clean, orderly appearance. This pattern works beautifully with rectangular pavers and is forgiving for DIY enthusiasts.
For areas that will see heavier use, consider a herringbone pattern. The interlocking arrangement provides maximum stability by distributing weight and preventing pavers from shifting. It’s particularly effective for driveways but also adds sophisticated visual interest to patios.
The basketweave pattern offers a timeless, classic look that works wonderfully with rectangular pavers. It creates a woven appearance that adds texture and character to your outdoor space without overwhelming the eye.
For a more natural, organic feel, the random or ashlar pattern uses varying paver sizes to create a less formal appearance. This pattern works beautifully with natural stone and can help your patio blend seamlessly with the surrounding landscape.
Want to create a true focal point? A circular pattern draws the eye and creates a natural gathering spot. While it requires more cutting and planning, the dramatic result can transform an ordinary patio into something extraordinary.
Budget-Friendly Patio Ideas
Building your dream patio doesn’t have to empty your wallet. With some creative thinking, you can create a beautiful outdoor space at a fraction of the cost.
Reclaimed materials offer both character and savings. Using second-hand paving slabs, bricks, or stones can cut your material costs by up to 50% while giving your patio unique personality and environmental benefits. We’ve helped many clients in Danvers source quality reclaimed materials that look anything but second-hand.
Consider incorporating gravel sections into your design. A mixed-material approach using premium pavers in the main seating area surrounded by neatly contained decorative gravel can dramatically reduce costs while adding texture and interest to your design.
Mixed materials create visual interest while being kind to your budget. Use premium materials in high-visibility areas and less expensive options in peripheral spaces. This approach allows you to splurge where it matters most while keeping overall costs reasonable.
For the truly adventurous, crazy paving offers a creative approach using irregular stone pieces or even broken concrete slabs arranged in a mosaic-like pattern. The result can be surprisingly artistic and substantially more affordable than uniform pavers.
If your dream patio exceeds your current budget, consider a phased installation approach. Start with the core area you’ll use most, ensuring the foundation extends beyond for future expansion. This allows you to spread the cost over time while enjoying your outdoor space immediately.
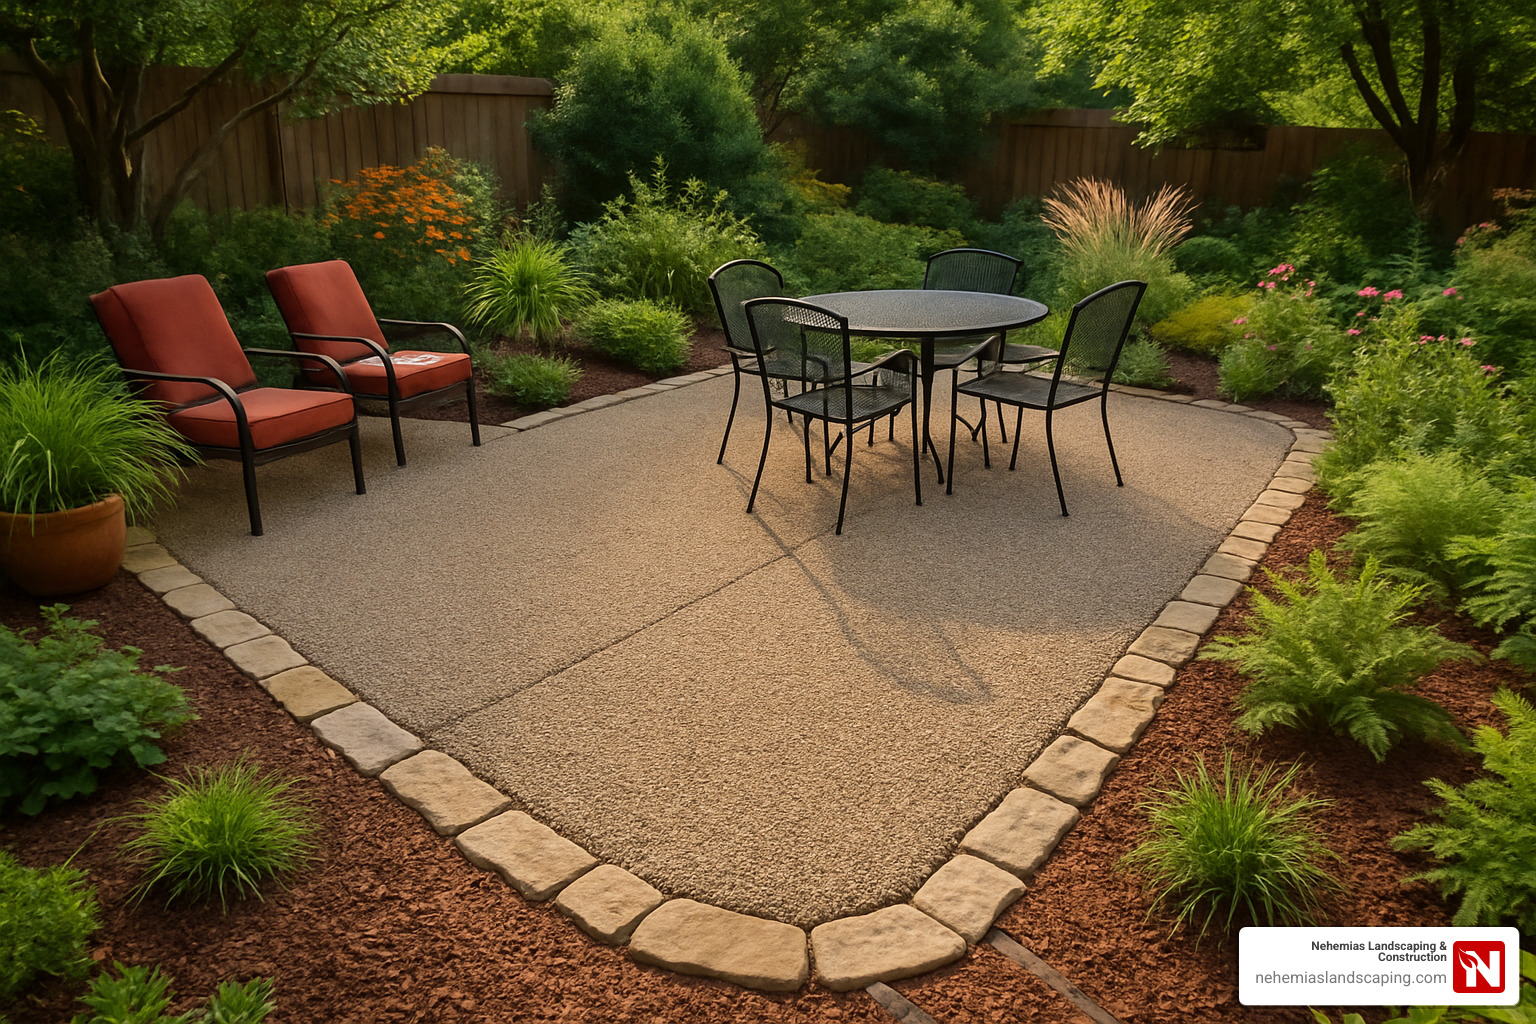
At Nehemias Landscaping & Construction, we pride ourselves on creating beautiful Patio Design and Build solutions that work with various budgets. Our team has mastered the art of balancing cost and quality to create stunning outdoor spaces that don’t break the bank.
One approach we’ve used successfully for clients throughout Essex County is combining premium natural stone in main entertaining areas with more affordable materials in transitional spaces. This creates a cohesive design that maximizes both beauty and value, giving you the best of both worlds.
Maintenance, Protection & Mistakes to Avoid
Taking care of your patio after installation is just as important as building it correctly in the first place. Think of your patio as a long-term relationship – it needs ongoing attention to stay beautiful for decades!
Protecting Your Investment
After you’ve carefully constructed all those garden patio layers, a little regular maintenance goes a long way:
Sealing your patio is like giving it a protective shield. For natural stone and concrete pavers, choose the right type of sealer for your needs. Water-based sealers let your pavers “breathe” while still offering protection, while enhancing sealers bring out those rich, deep colors that make your outdoor space pop. Plan to reapply every 2-3 years, or whenever you notice water no longer beading on the surface.
Regular cleaning prevents small issues from becoming big problems. A simple sweep once a week keeps debris from staining your beautiful pavers. Once a year, give your patio a thorough cleaning with a pressure washer – just be careful to use appropriate pressure settings (too high can damage some materials, especially softer natural stones). When you spot a stain from that spilled wine or BBQ sauce, address it quickly with a cleaner made specifically for your paving material.
Don’t forget about those joints! They’re the unsung heroes of your patio. Over time, even polymeric sand can wear down, so check periodically and top up as needed. If you spot a weed poking through, remove it right away – the longer you wait, the more established its root system becomes. Any cracked or loose jointing material should be repaired promptly to prevent further deterioration.
Winter can be tough on your garden patio layers, especially here in Massachusetts. Use plastic snow shovels instead of metal ones to avoid scratching your pavers. Be cautious with de-icing products, particularly on natural stone which can be sensitive to salt. And always ensure your drainage remains clear so melting snow has somewhere to go rather than freezing in place.
Common Mistakes to Avoid
At Nehemias Landscaping & Construction, we’ve installed hundreds of patios throughout Essex County, and we’ve seen what happens when corners get cut. Here are the most common mistakes to avoid:
Skimping on the sub-base is like building a house on sand – it might look fine initially, but problems will emerge. That settling and unevenness you see in older patios? Almost always traced back to an insufficient foundation layer. The extra time and materials for a proper 4-6 inch compacted sub-base pays off many times over.
The “spot-dabbing mortar” technique is a major no-no, though we still see DIYers doing it. Placing just a few dabs of mortar under each paver creates voids that collect water, leading to freeze-thaw damage and unstable surfaces. Always use a full mortar bed for proper support.
Getting the slope just right takes experience. Too little slope (less than 1:40) and you’ll have puddles forming after every rain. Too much slope and your patio furniture might roll away! This subtle but critical detail makes the difference between a professional installation and an amateur one.
That humble weed membrane might seem optional, but trust us – this simple layer prevents countless headaches down the road. It’s a small investment that pays huge dividends in reduced maintenance.
Mixing incompatible materials without proper transitions can create jarring visual effects. For example, placing decorative concrete directly adjacent to natural stone often creates an artificial appearance. We prefer creating thoughtful transitions between different materials for a cohesive look.
Using regular sand instead of polymeric sand for jointing might save a few dollars upfront but costs much more in ongoing maintenance. This is especially problematic in New England where our frequent rainfall washes away standard sand, leaving your pavers vulnerable to shifting.
Forgetting to include expansion joints in larger patios or those against structures is asking for trouble. These intentional gaps allow for the natural expansion and contraction that occurs with temperature changes, preventing cracks and buckling.
“You can’t beat the sense of accomplishment, a very rewarding endeavour 👍😃.”
There’s nothing quite like the satisfaction of building something beautiful with your own hands. Understanding the complexities of garden patio layers helps you decide whether to tackle installation yourself or call in the professionals.
At Nehemias Landscaping & Construction, we bring over 20 years of experience to every patio project in Essex County. We’ve learned these lessons the hard way so you don’t have to! Our team ensures proper installation from the ground up, creating outdoor spaces that bring joy for decades rather than headaches after a single season.
Frequently Asked Questions about Garden Patio Layers
What is the recommended depth for each layer?
One of the most common questions we hear from homeowners in Beverly and Salem is about proper depths for garden patio layers. Getting these measurements right is crucial for a lasting installation.
For your sub-base, aim for 4-6 inches (100-150mm) of compacted MOT Type 1 or crushed stone. If you’re in an area with clay soil (common in parts of Essex County) or planning a heavy-use area like an outdoor kitchen, go for the full 6 inches to prevent settling.
Your bedding layer should maintain a consistent 1 inch (25mm) depth across the entire patio. Whether you’re using sharp sand or a 5:1 sand-cement mortar mix, this consistency helps ensure a level finished surface.
The paving layer thickness varies by your chosen material. Concrete pavers typically run 2-2.4 inches (50-60mm) thick, while natural stone can vary widely from 0.75-2 inches (20-50mm). Porcelain pavers, growing in popularity for their low maintenance, usually measure 0.75-0.9 inches (20-23mm) thick.
For jointing, completely fill the gaps between pavers, which typically range from 0.25-0.5 inches (6-12mm) wide, depending on your paving style and material choice.
How do I maintain proper slope over time?
Maintaining the proper slope on your patio isn’t just about the initial installation—it’s about ensuring it stays that way for years to come. The ideal 1:40 slope (1 inch drop per 4 feet) helps water drain away from your home’s foundation.
Start with thorough compaction of each layer before adding the next. This prevents uneven settling that can disrupt your carefully planned slope. During installation, frequently use a long straight edge and level to verify you’re maintaining that 1:40 gradient consistently.
“Address issues promptly,” advises our lead installer at Nehemias Landscaping. “If you notice water pooling after rain, investigate and correct the cause rather than just treating symptoms.”
Strong edge restraints play a crucial role in preventing lateral movement that can affect your slope over time. Whether you choose plastic edging, metal, or a concrete haunch, these borders keep your patio structure intact.
Don’t forget to monitor drainage points regularly, keeping drains and channels clear of leaves and debris, especially in fall when Essex County’s beautiful foliage can quickly clog drainage systems.
Can I lay slabs directly on sand?
This question about garden patio layers comes up in almost every consultation we conduct in Danvers and Peabody. While it might seem like a tempting shortcut, the answer largely depends on your specific situation.
Standard block paving can sometimes be laid on a sand base for simple walkways, but for most patio applications—particularly with natural stone or porcelain slabs—a proper sub-base is absolutely essential.
Laying slabs directly on sand without a compacted sub-base creates several problems:
First, it provides insufficient support, leading to uneven settling and a patio that quickly becomes hazardous with lips and dips. Second, it offers poor drainage, which in our New England climate means frost heave during freeze-thaw cycles. Third, without proper foundation, slabs will shift and become loose over time, creating trip hazards. Finally, it creates an ideal environment for weed growth between and under your pavers.
As one of our experienced installers often tells clients: “Sandstone slabs require a hardcore sub-base (100 mm) and a 5:1 mortar bed rather than just laying on sand. The small extra effort upfront saves enormous headaches down the road.”
At Nehemias Landscaping & Construction, we always include a proper sub-base in our installations because we’ve seen how this foundation layer determines whether a patio lasts for decades or needs repairs after just a few seasons.
Conclusion
Building a patio with proper garden patio layers is both a science and an art. The science lies in the precise layering techniques, appropriate materials, and correct depths that ensure structural integrity. The art comes in the design choices, pattern selections, and finishing touches that make your outdoor space uniquely yours.
There’s something deeply satisfying about creating an outdoor living area that seamlessly extends your home into nature. A well-built patio transforms not just your property, but how you experience the outdoors – from morning coffee to evening gatherings under the stars.
While DIY patio installation can save up to 45% in labor costs, it requires careful planning, proper tools, and a good dose of patience. The average material costs range from $2.25 to $18+ per square foot depending on your choice of pavers, with additional expenses for sub-base, edging, and jointing materials. Premium natural stone can push costs even higher, sometimes reaching $30-40 per square foot for rare or imported materials. Please note that these are average costs based on internet data and not actual costs for Nehemias Landscaping & Construction.
For many homeowners in Essex County, Massachusetts, the complexity of proper installation leads them to seek professional help. The peace of mind that comes from knowing your patio is built to last through our harsh New England winters is often worth the investment. At Nehemias Landscaping & Construction, our Patio Installation Services combine technical expertise with artistic vision to create outdoor spaces that stand the test of time.
Whether you choose to DIY or hire professionals, understanding the importance of each layer in your patio construction will help you make informed decisions. A well-built patio isn’t just an addition to your home—it’s a change of your outdoor living experience. It’s where memories are made, from children’s birthday parties to quiet evenings watching fireflies dance across your yard.
From Beverly to Salem, Gloucester to Ipswich, and throughout Essex County, we’ve helped countless homeowners create beautiful, functional outdoor spaces that bring years of enjoyment. The smiles we see when clients first step onto their completed patio make every careful measurement and precise cut worthwhile.
If you’re ready to transform your backyard with a properly constructed patio, contact us today for a consultation. We’d love to hear about your vision and show you how we can make it a reality.
Remember: The patio you see is only as good as the layers you don’t see. Build it right, and you’ll enjoy your outdoor space for decades to come.